
Showing posts with label vegan. Show all posts

Monday, August 6, 2012

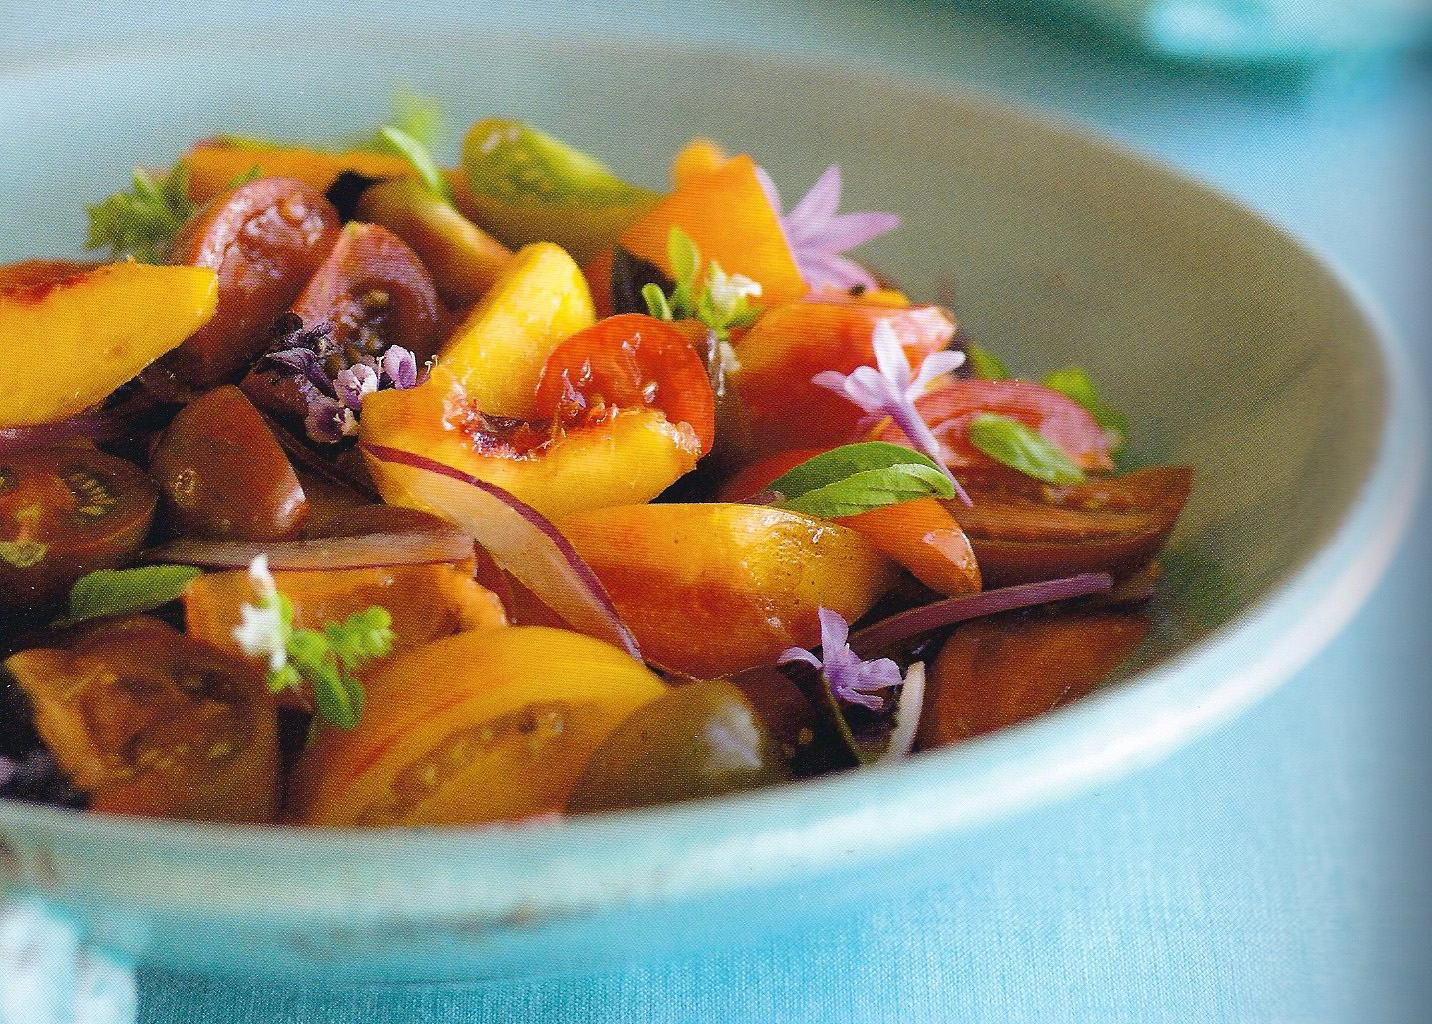
Tomato, Summer Peach and Fresh Herb Gazpacho Salad


I got a fantastic new cookbook while back East visiting family.  It's all vegetables - I LOVE it!!  The picture above is from the cookbook "Fast, Fresh & Green" by Susie Middleton.  I'm fairly adventurous and will try food at least once.  This one intrigued me and it ended up being DEEEElicious!

2 lbs Heirloom tomatoes (I used Compari and Pear tomatoes since our Heirlooms weren't good)
1 lb ripe peaches
1/2 small red onion
2 Tbsp extra virgin olive oil
2 Tbsp fresh orange juice or mango smoothie drink (add more if needed)
1 Tbsp balsamic vinegar (more if needed)
1 tsp soy sauce
1/2 tsp finely grated lemon zest
1/4 tsp kosher salt (**note: I used sea salt)
1/2 cup lightly packed small whole fresh mint and basil leaves (**note: I only used basil)
Edible Flowers, for garnish, optional

Core the large tomatoes and stem any cherry or tiny tomatoes.  Cut the larger tomatoes into large, evenly sized pieces.  To do this easily, first cut the tomatoes crosswise into thick slabs, and then cut the slabs into large dice.  If the tomatoes are very irregularly shaped, just cut them into wedges and then cut the wedges in half.  Cut the cherry or tiny tomatoes in half or into quarters.  Put all of the tomatoes into a large, shallow serving bowl.

Peel the peaches with a paring knife and slice them off the pit into wedges (whatever size you like, depending on the size of your peach.)  Add the peaches to the bowl.  Slice the onion lengthwise as thinly as you can and add it to the bowl, too.

Whisk together the olive oil, orange juice, balsamic vinegar, soy sauce, lemon zest, and salt.  Pour the dressing over the tomatoes and peaches.  Add half of the herbs, season with salt and toss gently but thoroughly.  Taste the juices and add more dressing if you need to.  Before serving, toss again and add the remaining herbs and flowers for garnish.  Enjoy!

**Notes:  I made this for my lunch.  It made 4 1/2 cup servings for me.  The flavors got better each day.

Monday, May 28, 2012

White & Green Bean Zucchini Salad

This salad is light but filling.  It's really refreshing and perfect for a warm summers day.  Blaine tried it warmed up in the microwave and liked it both ways.   

Ingredients:

2 15 ounce cans cannellini beans, drained and rinsed
2 small zucchini, quartered lengthwise and thinly sliced
6 ounces thin green beans, trimmed and sliced (or haricot verts)
1/2 cup fresh basil leaves torn OR 1 Tablespoon dried basil
2 lemons, juiced and zested
1 T olive oil
Salt and Pepper to taste

In a medium bowl combined white beans, green beans and zucchini.  In a smaller bowl combine lemon juice, lemon zest, olive oil & bail.  Mix well and pour over beans and zucchini.  Mix well.  Season with salt and pepper. 

Saturday, January 7, 2012

Kale Chips

We have a dehydrator that I have been having fun with trying new recipes.  My favorite thing to make with it thus far is Kale Chips.  You can use regular kale - I prefer the Lacinato or Dino Kale personally.

I haven't been able to find lacinato at the regular grocery store, but I can find it at Whole Foods and for those in Texas - Central Market.

1 Bunch Lacinato/Dino Kale
1/2 cup olive oil
pastry brush
wax/parchment paper
Dehydrator or Oven set to 350 F (if you use a dehydrator it's considered "raw" still)
seasonings of choice (I prefer sea salt and garlic powder)

Wash the kale and pat dry with a towel.  Strip the leaves from the stem. To do that, just grab the leaf at the bottom with one hand, wrap the other hand around the base in a loose grip/fist and pull stem and leaf in opposite directions.  I forgot to take a picture showing this.  It's really easy.  You can save the stems to juice if you have a juicer.  You can slice the leaves into smaller pieces or tear them into the size you prefer or leave them whole.
Brush the chips with the olive oil then sprinkle with the seasonings - be sparse with seasonings - dehydrating them makes them stronger.  You definitely need to cover them with oil or you'll just end up with wilted kale - not crisp chips.  I found that out the hard way :D
Arrange the leaves on the drying tray.  Once all are done, stack the trays and turn the dehydrator onto 110 F for 2-4 hours.  Check them periodically and rotate the trays so they dry evenly.  If you're baking them, line a non-insulated cookie tray with parchment paper and bake each batch for 10-15 minutes.(I've never baked them but they turn out similarly from what a friend says.)


Once they're done, eat and enjoy!  I've eaten them plain, with tuna and with hummus - not tuna and hummus together ;)

Monday, November 22, 2010

Vegan/Gluten-Free Pumpkin Pie

I got this from Gluten Free Goddess (glutenfreegoddess.blogspot.com) and love it!  I love pie, especially Pumpkin, and since there are some food allergies where we're having Thanksgiving I've tried some variations.  I'll make my substitutions in parenthesis in the ingredients list.
_____________________________
I made the pie in a food processor. It helps to thoroughly process the ingredients. If you don't have a food processor, a macho stand mixer will work. (I used my VitaMix.)

Preheat the oven to 350 degrees F. Lightly grease a 9-inch glass pie plate. (I made mini pies and used muffin wrappers.)

In a food processor bowl add:

1 14.5-oz can pumpkin
1 1/2 cups plain hemp milk (used rice & coconut milk)
2 teaspoons bourbon vanilla (regular pure vanilla)
2 tablespoons light olive oil
1 tablespoon Ener-G Egg Replacer
3/4 cup organic brown sugar (Organic Unrefined Whole Cane Sugar {Rapunzel})
1/2 cup buckwheat flour
2 tablespoons tapioca starch/flour
2 teaspoons baking powder
1/4 teaspoon xanthan gum (Arrowroot)
1/2 teaspoon sea salt
1 teaspoon cinnamon or pie spice
1/2 teaspoon nutmeg

Cover and process until smooth and creamy. Stop and scrape the sides of the bowl, if necessary to incorporate all of the dry ingredients. Pour into the prepared pie plate and smooth evenly. Bake in the center of a preheated oven for about an hour until done. The pie should be firm- but still give a little when lightly touched. The center should not be wet. It will fall a bit as it cools, like my Flourless Chocolate Cake recipe. (it only took about 20 mins to bake the mini ones)

Cool the pie on a wire rack completely. Cover and chill in the refrigerator until serving.
___________________
I made another version where I took out the buckwheat flour in the mixture and used buckwheat flour in my pie crust recipe (also on Easy Peasy Pie Crust) and like it even better.  I like crust what can I say.  I've been a pie machine the last few days!  Hopefully the family will enjoy the fruits of my labors! ;)